Discord is one of the most popular communication platforms in the world, especially between gamers. Lately, COVID-19 or coronavirus caused cancellation for all events and forced people to work remotely. It’s hard to adapt to remote work quickly, but thanks to Discord, it will be easier. Today we will help you to create a server and set it up for remote working. So without further introductions, let’s start with the first step.
How to create a Discord server
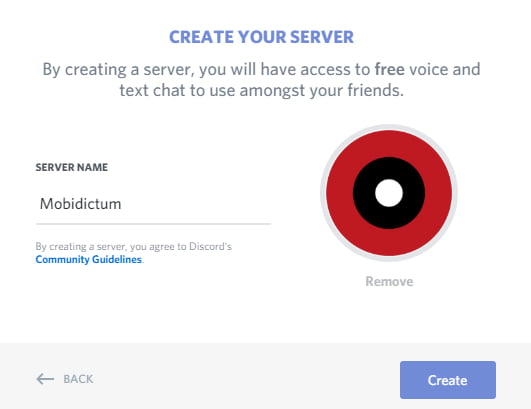
First of all, you have to download the app. After that, create an account and log in, its all should be easy. Now when you are in, press on the big plus sign (+) on the left panel. A window will appear with two options: “Create” or “Join”, here we are going to choose the first one. Now, it’s time to choose a server name, the obvious one is your company’s name or whatever comes to your mind. Also, don’t forget to upload your company’s logo to make things more official.

Discord will automatically add you to the server you just created. Now press on your server’s name on the top left and head to “Server Settings”. Now, press on “Server Region” and choose a region that is close to you and your team, to get the lowest latency possible. Congratulation, you finished the task, but now we should make it more like “business” than “gaming”.
Time to create channels
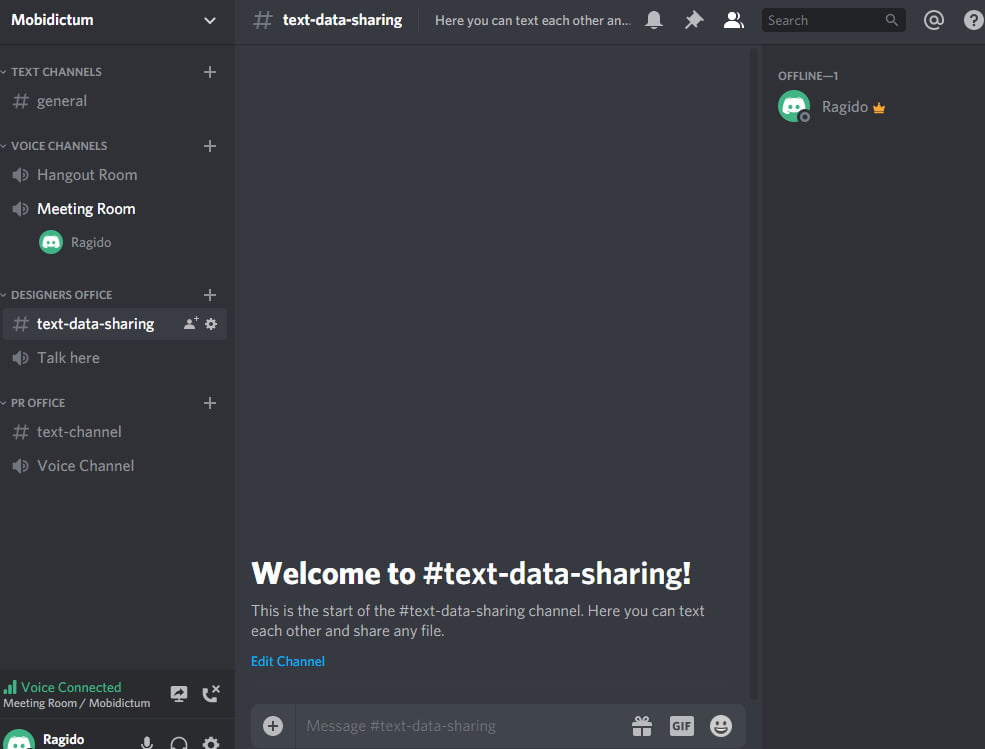
Does your company has offices for each task? if not just imagine with me. You don’t want everyone to share or talk in the same room, as each team needs its own text and voice channel. We want to create a good workplace, that’s what we will talk about now. Let’s say that we have a designers team who work in their own offices, they talk with each other and share some files between them. On the dark grey side, right-click and select “Create Category” and give it a name like “Designers Office”. Now this category is separate from the general one, press on the plus sign next to it and create a text and voice channels.
That’s the idea, but let’s do one more. For example, the PR team has its own office, so let’s not take that away from them. Again we right click and we create a new category named “PR Office”. Now create two rooms (or more if you want) and give them good names. You can also create categories or rooms for different things such as a meeting room or a place where everyone can hangout. Also, write a description for each channel to make sure that everyone understands what it’s for.

Roles are really important in your Discord server
Discord has something called roles, which gives each user a specific permission. For example, you can create a role named “Designer” or “Artist” and assign it to a user. Then make the “Designers Office” category only accessible to people with these permissions. This will make everything easier to manage and will keep your project safer.
To assign a role, go to your server settings and select the “Roles” tab from the left side. You will see that the only role is @everyone, press on the plus sign next to it and name your new role. You get the idea now, right? Let’s call the new role “designers” and give them a nice color of your choice. There are many options you can give to the users with this role, it’s up to you. The important part is managing who can see and interact with the channel.
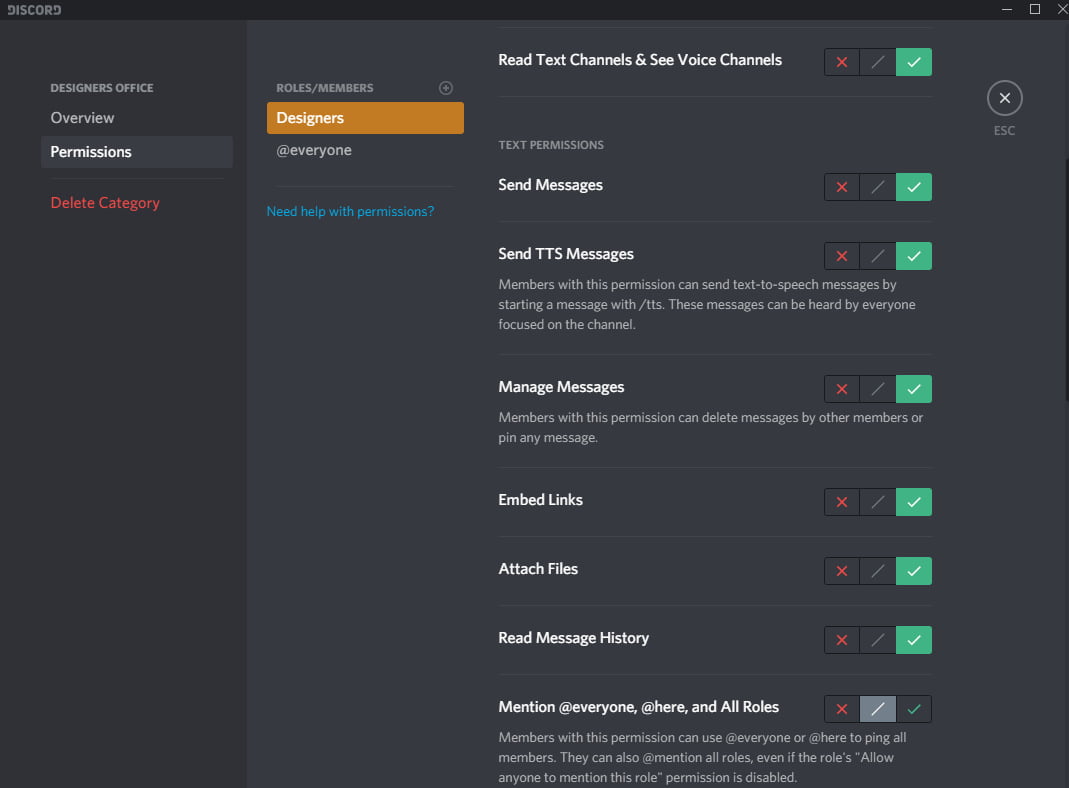
Remember the Designers Office category we created earlier? right-click on it and press “edit Category”, after that go to permissions and turn off the permission to send messages and connect to the channels for @everyone role. Now, choose the new role we created and allow them to do so. This means only people with “designers” role will be able to join these channels and talk or send messages. To give permission to users, simply right-click on it (in the right panel) and choose “Roles” tab at the end of the list. All that you have to do now is assign the new we created.

One last thing
This is everything you need to know about creating a Discord server and setting up. One last thing, you need to invite your team, you know, so it won’t be a ghost town. To do that, press on your server’s name on the top and select “invite people”. Here you can send invites directly if they are on your friend list or send an invite link. You can choose the time when the link expires, to get fewer messages from your colleagues, press on “edit invite link” and set it to “never”.
Now, you have everything you need to know. Working remotely is not bad, having a good place to communicate and work with your team digitally makes it even better. We at Mobidictum wish you the best of luck out there!


